Ready to Roll
Life was quite different until 2020.
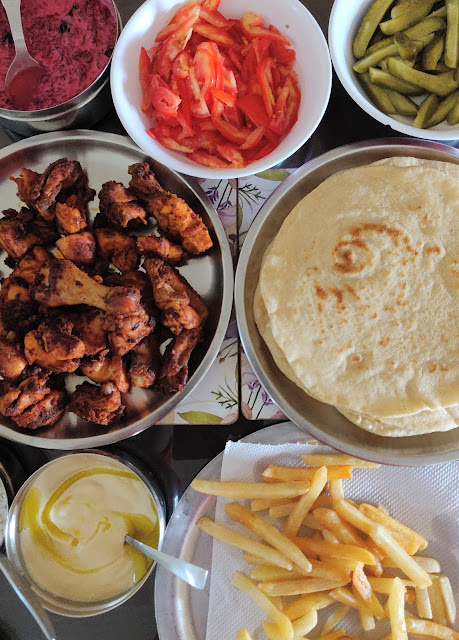
During the lockdowns, one of the things we missed a lot, was indulging at our favorite shawarma place.
Soon enough the cravings got the better of me and I started making them at home. On weekends when I could manage to get the different components of shawarma ready, we would sit around the dining table and enjoy a RYOS (Roll-Your-Own-Shawarma) lunch.

PITA BREAD WITH GEMMA'S CRAZY DOUGH
1 batch of Gemma's crazy dough - You can find the recipe here.
If you are lactose intolerant like some of us or have trouble digesting milk-products, use water instead of milk, while making crazy dough. Yoghurt is usually tolerated well by the lactose-intolerant.
Divide the dough into 8-9 balls.
Roll out a ball of dough to roughly 2-3 mm thickness. Use all-purpose flour for dusting if the dough is sticky. Keep the rest of the dough balls covered. (I like to roll out 2 balls and cook the first one while rolling out the third)
Heat a heavy-bottomed iron skillet until you can feel the heat when you hold out your hand about 10 cm over the pan.
While cooking the pita, keep in mind that you have cook each side of the pita twice - first on low flame and then on high flame.
To do this, place the rolled out dough on the iron skillet and lower the flame. When small bubbles begin to appear, turn it over. After 5-7 seconds turn it over again. Now that you have cooked each side of the pita on low flame, increase the flame to high.
The tiny bubbles will grow bigger and new ones will form. Gently press some of bubbles with a wooden spatula to help them grow even bigger. Turn it over one last time and gently press the bubbles until all of them combine to one big puffed up pita.
Take the pita off the pan and place in a covered box.
Whether you make shawarma with the pitas or eat them plain, they are delicious. They are versatile and pair well with almost anything - curries, chutneys, dips, roasted meat, veggies, the list is endless...


Comments
Post a Comment
Thank you for taking the time to visit my blog. Please let me know how you feel about the post.